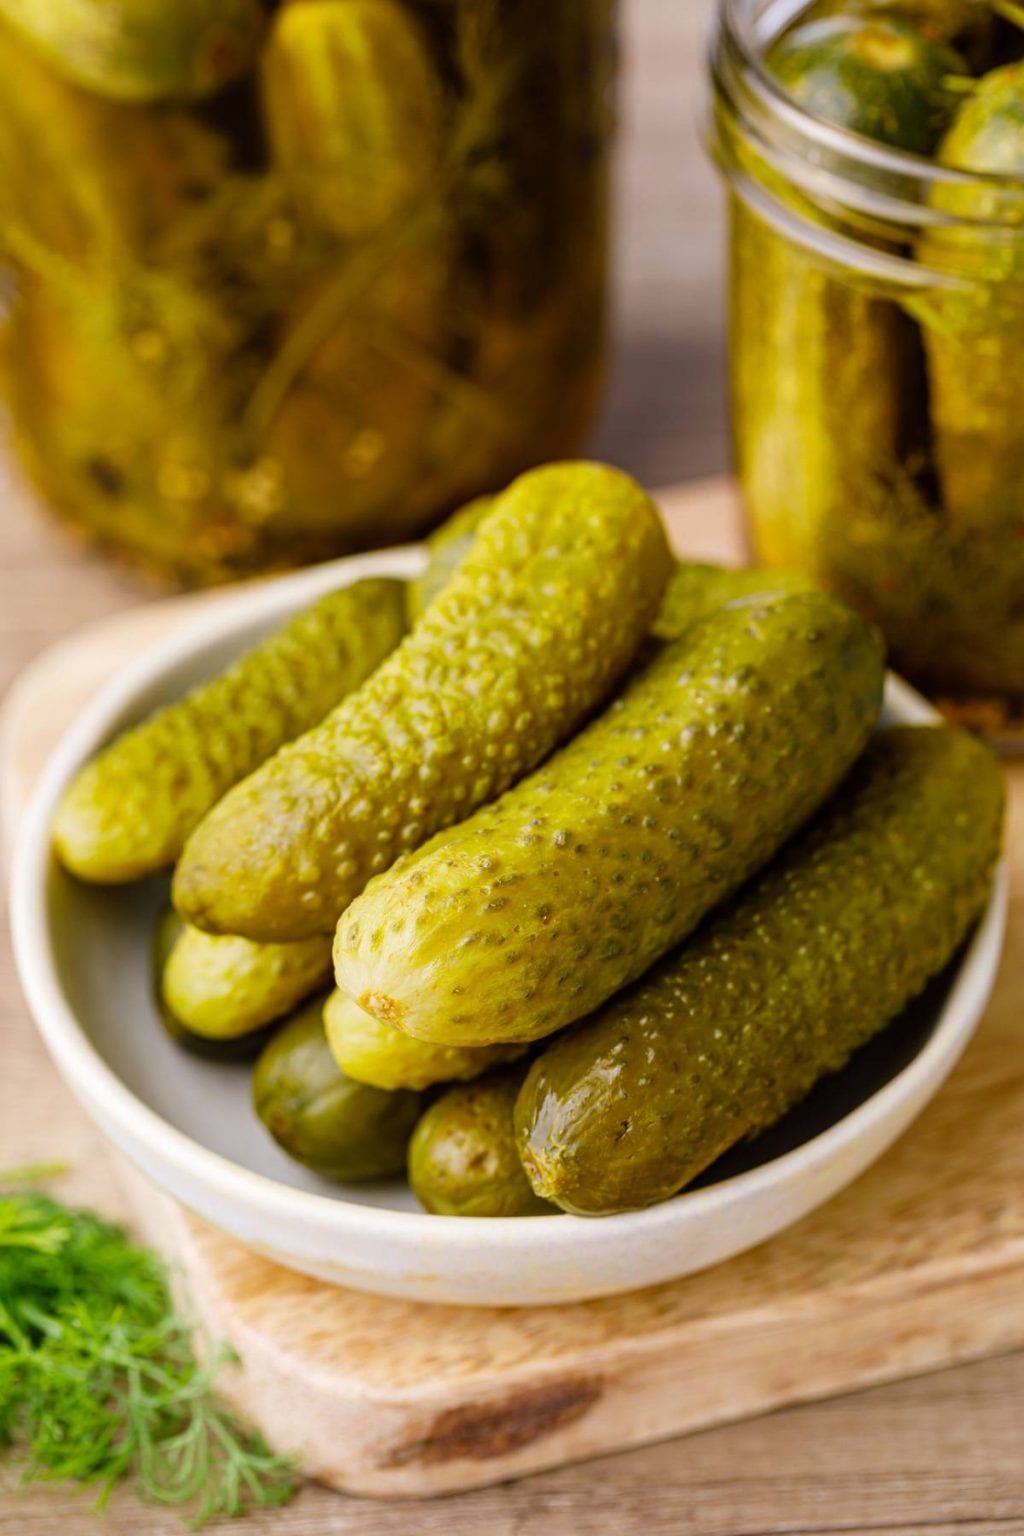
Crispy Dill Pickle Recipe
Nothing beats the satisfying crunch of a crispy dill pickle that perfect bite that’s both tangy and refreshing. If you’ve ever wondered how to make your own crispy dill pickle recipe at home, you’re in for a treat. With just a few simple ingredients and the right technique, you can create crunchy, flavorful pickles that rival your favorite store-bought brands.
Homemade pickles are fresher, healthier, and customizable. Whether you like them garlicky, spicy, or extra sour, this guide will show you how to master the art of pickling with consistent crunch every time.
Recipe Card
Recipe: Classic Crispy Dill Pickles
- Prep Time: 20 minutes
- Cook Time: 10 minutes
- Rest Time: 24 hours (for flavor to develop)
- Total Time: 24 hours 30 minutes
- Servings: 4 pint jars
- Calories per serving: ~15 kcal
🧂 Ingredients
- 2 pounds fresh pickling cucumbers (small and firm)
- 4 cups water
- 2 cups white vinegar (5% acidity)
- 2 tablespoons pickling salt or kosher salt
- 4 cloves garlic, peeled and smashed
- 4 teaspoons dill seeds or 4 sprigs of fresh dill weed
- 1 teaspoon mustard seeds (optional)
- 1 teaspoon black peppercorns (optional)
- 1 teaspoon red pepper flakes (optional, for spicy pickles)
- 4 grape leaves or 1 teaspoon calcium chloride (Pickle Crisp) for crunch
Instructions
- Prepare cucumbers: Wash cucumbers thoroughly and trim ⅛ inch off the blossom end (this prevents soft pickles). You can slice them into spears, chips, or leave them whole.
- Sterilize jars: Place pint jars and lids in boiling water for 10 minutes to sterilize.
- Make the brine: In a large pot, combine water, vinegar, and salt. Bring to a boil until salt dissolves. Remove from heat and let cool slightly.
- Pack jars: In each jar, add one clove of garlic, dill seeds or sprigs, mustard seeds, peppercorns, and one grape leaf. Pack cucumbers tightly but without crushing.
- Add brine: Pour hot brine over cucumbers, leaving ½ inch headspace at the top.
- Seal jars: Wipe rims clean and apply lids.
- Process (optional for shelf-stable): Process jars in a boiling water bath for 10 minutes. For refrigerator pickles, skip this step.
- Cool & store: Let jars cool at room temperature, then refrigerate. Allow at least 24 hours for flavors to develop before eating.
Nutrition (per serving)
- Calories: 15 kcal
- Fat: 0g
- Carbohydrates: 3g
- Sodium: 420mg
- Protein: 0g
- Fiber: 1g
The Secret to Crispy Pickles
The most common question people have when making pickles is: “How do I keep them crunchy?”
Here’s how:
- Use fresh cucumbers: The fresher the cucumber, the crunchier your pickle. Ideally, use them within 24 hours of harvest.
- Trim the blossom end: The blossom end contains enzymes that can soften pickles. Always trim it off!
- Add grape leaves or calcium chloride: Both help maintain crunch by inhibiting softening enzymes.
- Avoid over-processing: If you’re canning, don’t boil too long excessive heat can make pickles soft.
- Cold brine for fridge pickles: For refrigerator pickles, cooling the brine before adding to cucumbers helps preserve texture.
If you enjoy old-fashioned, preserved recipes like this, you’ll love our Cracklin Bread Recipe another Southern classic that’s full of flavor and tradition.
Flavor Variations
One of the best things about making your own crispy dill pickles is that you can easily customize the flavor. Try these creative twists:
🌶 Spicy Dill Pickles
Add a few slices of jalapeño or ½ teaspoon of red pepper flakes to each jar for a fiery kick.
🍋 Lemon Dill Pickles
Add a slice of lemon and a few coriander seeds for a bright, citrusy flavor.
🧅 Sweet Dill Pickles
Stir 1 tablespoon of sugar into your brine for a lightly sweet-and-sour pickle perfect for sandwiches and burgers.
🧄 Garlic Lover’s Pickles
Add extra cloves of garlic to boost the flavor (just beware, these will be strong after a few days!).
For another great homemade snack idea, check out our Biltong Food Recipes perfect for those who love savory, high-protein treats.
How to Serve Crispy Dill Pickles
Crispy dill pickles aren’t just for snacking straight out of the jar. Here are a few tasty ways to use them:
- On burgers or sandwiches: Add crunch and tang to your favorite grilled burger or deli sandwich.
- In salads: Chop them up for a zesty kick in potato or chicken salad.
- With cheese boards: Pair them with sharp cheddar, cured meats, and crackers.
- Fried pickles: Coat slices in flour and breadcrumbs, then deep-fry for a Southern-style appetizer.
If you love creative recipes like this, try our Cinna Bun Cake Recipe next it’s a sweet counterpart to your tangy pickles!
Storage & Shelf Life
- Refrigerator pickles: Store in the fridge for up to 3 months.
- Canned pickles: Properly processed jars can last up to 1 year in a cool, dark place.
- After opening: Keep refrigerated and consume within 1 month for best crunch.
Pro tip: The flavor improves after a few days as the brine fully infuses the cucumbers.
Common Questions
1. Can I reuse pickle brine?
Not recommended for canning. However, you can reuse it once for refrigerator pickles if you reboil and adjust the salt/vinegar ratio.
2. What cucumbers are best for pickling?
Small, firm pickling cucumbers (Kirby or Persian) work best because they stay crunchy.
3. Can I make them without vinegar?
Traditional dill pickles require vinegar, but you can ferment cucumbers in a saltwater brine for a naturally sour, probiotic version.
4. Why did my pickles turn soft?
Overripe cucumbers, too much heat during canning, or skipping the blossom-end trimming can cause this.
5. What’s the best salt for pickles?
Use pickling or kosher salt table salt contains additives that can cloud your brine.
Tips for Perfect Pickles Every Time
- Always start with sterilized jars.
- Adjust vinegar-to-water ratio for your taste (1:1 for tangier pickles, 1:2 for milder).
- Avoid metal utensils when handling pickles; use wood or plastic to prevent a metallic taste.
- Let the pickles sit at least 24 hours before tasting they get better with time!
Final Thoughts
Homemade crispy dill pickles are easy to make, incredibly flavorful, and a great way to enjoy the taste of summer all year long. Whether you’re canning them for your pantry or making small refrigerator batches, the key to perfection is simple fresh cucumbers, a balanced brine, and a touch of patience.
Once you’ve mastered this crispy dill pickle recipe, you’ll never go back to store-bought jars again. The crunch, the flavor, and the satisfaction of making it yourself are unbeatable.
Try pairing your homemade pickles with fried chicken, sandwiches, or even as a zesty side dish. And if you’re craving more kitchen inspiration, head over to FatRecipe.com for hundreds of easy and delicious homemade recipes.
Useful information. Fortunate me I found your website by accident, and I am
surprised why this twist of fate did not came about earlier!
I bookmarked it.